Sidebar
Table of Contents
Add this page to your book
Remove this page from your book
D230 Software
Prior to installation
The D230 system has some requirements:
- The system needs to be connected to a computer with a true RS232 serial port. It does not function correctly with converters to USB or to Ethernet. When required to obtain a serial port card, check that it is based upon UART chips such as 16550, 16650, 16750 or 16950. This is also possible for portable computers that have an ExpressCard expansion port.
- Use the RS232 cable that was supplied with the system. When required to obtain a new one, check it is of the type 'straight forwarded' or (1:1). Do not use null-modem cables.
- The software runs under Windows. Although originally written under Win XP, it functions fairly good under Windows 10 but might show some minor cosmetic anomalies. It might be required to set the compatibility 'Win XP SP3'(see Properties of the program using the Windows explorer).
Installation
The software can be downloaded hereD230 v1.4.41. An explorer window will open where you can choose the folder to download the ZIP file.
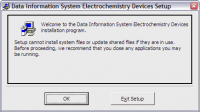
When downloaded, use the Windows Explorer to navigate to the ZIP file, right-click it and choose to extract the contents. Navigate to the extracted files and start the program setup.exe. The setup program will start, copy some files and show the following window:
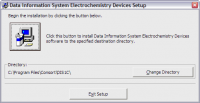
Close unnecessary programs and choose OK to obtain the following:
Click the big button to install the software:
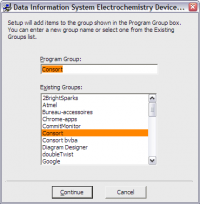
Confirm by clicking Continue. The installation of program will continue.
It might be possible that a window opens requesting whether it needs to replace existing files that are newer than the ones it wants to install. Confirm to keep the existing files so the latest files remain intact.
When the complete installation is finished, you'll be able to confirm by clicking OK. The program can opened by choosing the Start menu button and select it from the group Consort.
Use the D230 program
Now the program has been installed, it will be required to set it up so that the device can be read and the data can be logged.
For newer Windows systems (7 and 8.x), it will be required to set the program compatibility to Windows XP SP3. This can be done by choosing the shortcut that will be used to start the program. Right-click it and choose Properties from the pop-up menu. The shown window will have a tabbed page Compatibility. Choose this page and set the compatibility mode. It might be required to set also the option to run the program as an administrator on the same page. Choose OK to confirm the modifications.
To start and to configure the system, please check the help file of the program and navigate to 'How to … get started?'.
Run the D230 program as Demo
It is possible to install and to test the program on your system to check its functionality and the compatibility. To do so:
- Install the software as described here above.
- Right-click the shortcut that will be used to run the program.
- Choose Properties.
- Locate the text box Target on the tabbed page of the shortcut.
- Add the text /demo behind the full path of the program.
- Click OK to close the window.
You can now open the program with this shortcut. It will run as a demo version which allows you to perform several actions without making use of the physical device itself. You can perform the setup of the channels, log data, create and configure graphs and so on. You can not search for a physical device, neither can you complete full calibrations of the electrodes.
It is also possible to open the Help information which explains a lot more about the use of the device and the program.


